Processes & Proced...

Capturing DAT Tapes

Overview DAT tapes look very similar to miniDV tapes.  The thickness of the tapes are pretty much the same as 8mm video and miniDV tapes.  The tapes are 3-4mm larger than the miniDV tapes in both width and length.  DAT tapes existed for a short period of time before CDs really took off.  DAT's were used for high quality digital audio recordings.

Our Setup

We use the TASCAM DA-30 MkII that is connected to the Echo Layla 24 via a S/PDIF black coax cable with RCA connectors (one at each end).  We capture using Vegas on MUSIC.  In the RAW folder on MUSIC is a template Vegas file called "Stereo DAT...".

Hardware

Make sure the S/PDIF black coax cable is plugged into the S/PDIF RCA connection at the back of the Echo box and the other end is plugged into the Digital RCA connection at the back of the DAT player.

Prepare to capture:

1)  Open Stereo DAT veg file

2)  Create capture folder in RAW

3)  Go to the Echo console (see in system tray or check under program files).

4)  Use the saved settings for DAT.

5)  Play DAT and test system.

6)   Restore the Echo console settings to analogue - use saved "standard analogue settings".

Echo Console Settings

The primary setting for DAT or analogue (everything else) is the INPUT CLOCK setting.

For DAT this must be set to S/PDIF and for everything else this must be INTERNAL.

Under the DIGITAL MODE settings, for DAT (for analogue this setting has no impact so does not need to be changed), this needs to be set to S/PDIF RCA.

Scanning Long Strips of 35mm Negatives

Overview Generally with the Nikon film scanner and the SA-21 film adaptor you can only scan 2 to 6 negative strips.  The SA-30 is a bulk film holder that can handle strips of up to 40 negatives.  The SA-21 can be "modified" to flake a SA-30.

Solution

This is taken from a blog: https://groups.google.com/forum/#!topic/comp.periphs.scanners/-LdJf3r23h4  by Kennedy McEwan Apr 25, 2005:

Incidentally, for those who do not want to take the risk of opening their SA-21 up and making a permanent solder link modification, there is an alternative temporary fix, albeit a little less reliable.

The two contacts of the link in question connect directly to pins 16 and 17 of the blue rear connector on the SA-21. Looking into the rear of the SA-21 with the adapter the correct way up, pin 13 is on the middle row on the left of the connector, so just count 4 and 5 pins across and you get to the two pins in question. These can be shorted together using some very fine wire (I/John used a strand of copper wire from speaker wire ....length of about 14 mm) - thin enough so that the operation of the connector contact is not interfered with. Then hold the link wire in place with some adhesive tape - Scotch Magic tape works quite well for this.

Before pushing the SA-21 back into the scanner, make sure that you pierce the adhesive tape over each contact in the connector block with a pin. This will prevent the corresponding pins in the scanner being subjected to additional pressure as the adapter is pushed home in the scanner.

NOTE:

I took a black sharpie and highlighted the area around pins 16 and 17.

Mbps, Internet Speed, etc

Overview What is the internet speed and how do you measure it.  Internet speed is measured as Mbps which is Mega bits per second.  Often Mbps is confused with MBps whic is Mega bytes per second.  As there are 8 bits in a byte, MBps would be 1/8 of Mbps.  When we measure data size we usually talk about MB or GB which is Mega bytes or Giga bytes.

Our current internet speed is:

download:   100 Mbps      Upload:    20 Mbps

If we have a 1GB file and it takes 45 minutes to upload, the speed is calculated as:

1GB x 1024 = 1024 MB x 8 = 8192Mb

45 minutes x 60 = 2700 seconds

8192 / 2700 = 3.03 Mbps

If the same file took 8 minutes to upload, the speed is calculated as:

8 minutes x 60 = 480 seconds

8192 / 480 = 17.07 Mbps


Some Extra Calculations

1 gb=1024 MB (mega bytes) 1 mb=1024 KB(kilobytes) 1 KB=1024 bytes

1 GB=1024*1024*1024 bytes =1073741824 bytes

Is The Video PAL

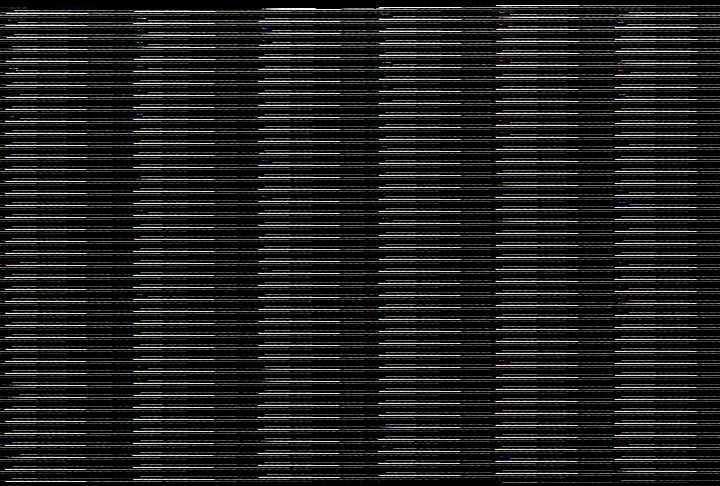
Overview Had a Umatic tape and the label said "PAL?".  How can I tell if it is PAL?  The tape played with mostly snow.

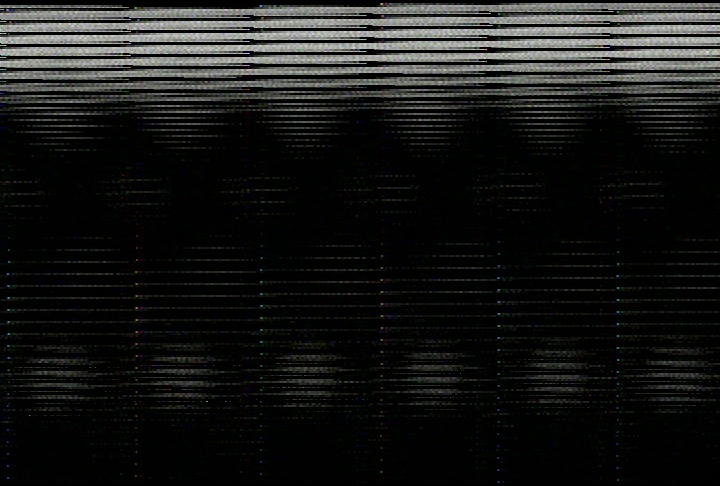
Had another tape and this one was created in Australia so we suspected PAL.  The audio sounded fine but the video showed black & white and in 6 columns across the screen.

Image1

Image2

The vcr's "servo led" was also blinking green.  Normally the servo should be solid green.

Solution

Very simple method.  The Umatic machine has a running timecode (so does the Sony SVHS).  The last two digits of the timecode are frames.  PAL tapes should never get higher than 25 and NTSC tapes will go as high as 29.  So, plug in the tape and watch the timecodes.  This could be a RED HERRING.

In the case of the second tape, the frame count did go up to 29.  The frame count is more accurate with Betacam or VHS machines.  Sometimes the frame count is machine based and not tape....as is with this Umatic.

The sound on the latest tape did not seem odd, but then the sound would only be off by 4.1% and therefore the pitch change is probably unnoticeable.

The image was definitely wrong and this may be due to the 625 versus 525 line difference between PAL and NTSC.

And the servo light was blinking green instead of solid.

Epson Film Holders

Overview An article on film holders, film sizes, etc.

Holders

Film Name Common Name Image (mm) Image (inches) Film Width (mm) Support Holder
110 Pocket instamatics 13x17 16 120
116/616 63 2.5 69 120
117/120 Medium format  57x41 to 83  2.25x1.625 to 3.25 OEM
122/124/125  83x108/140 3.25x4.25/5.5 120
123 4x5 100x126 4x5 OEM
126 26.5x26.5 35 120
127 41.3 1 5/8 46 120
135 35mm film strips 25 35 OEM


References

https://en.wikipedia.org/wiki/Film_format

http://www.negative-solutions.com/index.html

http://filmscanusa.net/main.sc


Create ProRes file from avi or mxf or mp4

Overview Need to be able to create a ProRes file from a standard PC video file....such as AVI, Mp4, MXF.

ProRes

Source: https://www.youtube.com/watch?v=b7pfwX8j1Sk

1)            Download Avanti, ffmpeg, avisynth  - use 32bit versions

http://www.avanti.arrozcru.org/

2)            setup prores profile on the GUI

- make sure aspect is set correctly

- make sure audio is set correctly - usually "copy"

3)            add "-profile:v 3"  for 422HQ otherwise it would be 422HD for option 2?

Installing Windows 10

Overview This is an article on my first install of Win10.  Installed Win10 on SPACE due to an issue with the current OS install, Win7 Ultimate.

The current OS was complaining it was not a valid version and therefore I had a few days left before it "expired".

I purchased a download of Win7 Home Premium and a 240GB SSD with the intention of installing the SSD, disconnecting the current C drive, installing Win7 home on the SSD, and then immediately upgrading the SSD install to Win10.

Steps

1)  created a bootable flashdrive and installed Win7 onto the flashdrive.

2)  copied the LHF admin folder to an external drive.

3)  disconnected the C: drive and the I: drive (music backup).  The I: drive had to be disconnected as I needed a SATA connection for the SSD.  (the old C: drive was an IDE).

4)  had to change the BIOS drive stuff from IDE to ACHI before I could get to the SSD.

5)  booted from the flashdrive and installed the OS onto the SSD

6)  downloaded the win10 upgrade tool and run it on SPACE

7)  after upgrade to Win10 I found that the system was rebooting every 1 to 3 hours (not sure exactly).

  • Win10 device manager did not show any device driver errors
  • the reboots seem to complain about something trying to write to read-only memory...indicates a driver issue according to the net
  • I updated the Nvidia driver that was a couple releases out of date...no change
  • downloaded and ran "driver booster 2" and it found 2 drivers way out of date and 1 just old...updated these.  still no change.
  • checked the ASUS drivers on their site and they were all at least 5 years old
  • changed the power save to never shutdown, and the screen saver to 30 minutes...now we've been runs for a few days with no errors.  Didn't want to shutdown anyhow with so many PC's accessing SPACE.

Get a list of programs installed on a PC

Overview When rebuilding a PC it is always really handy to know what programs are installed on a PC.  Here's a simple way to do this:

1)  Search (program files search window) for Windows Easy Transfer.

2)  Run the program...helps to have a flashdrive or HDD connected to the system to write to.

a)  Don't selected all the SHARED ITEMS as this could be huge.  Go into customize and de-select a lot of the shared items.

3)  After the program has been run, there is a Programs Report that could be run (again search for easy transfer....select reports one).  The program will show the report but you cannot print it.  Here is the location of the XML file with the info....just open it in excel:

C:\ProgramData\Microsoft\Windows Easy Transfer\PostMigData\2011-10-14\SourceAppList.xml

Reference:

Lots of info on the program:

http://www.technospot.net/blogs/windows-7-easy-transfer-files-users-settings/

NTSC to PAL DVD Conversion

Overview: Customer has a NTSC DVD that they want converted to PAL.

When recreating the DVD the menu cannot be transferred over (without a huge amount of work).  So, we recreate the menu and scene selection by creating markers for each clip and placing these for menu markers.

Steps:

  1. Using Sony Vegas import the media from the DVD.
  2. Place media on the Vegas timeline
  3. Go to UltimateS' marker tab and create "Marks" for each event.
    1. Use "Chapter" or "Scene" plus sequence numbers to create the names.
  4. Create a Region for the whole DVD...all clips.
  5. Render out the regions using UltimateS batch render and select the correct PAL DVD preset (full or widescreen).
  6. Open DVD Arch; choose "Menu Based".
  7. Set to PAL and the correct aspect, 4:3 or 16:9; be aware of the finer details ie., MPEG-2 720x576-50i, 4:3 (PAL).
  8. Create "PLAY ALL" button by right-clicking on the home page and inserting large media file (that incidentally has markers from vegas denoting all the scenes).
  9. Change the 'video' name to "PLAY ALL".
  10. Delete the old PLAY ALL button as you don't need that one.
  11. Right-click on the new PLAY ALL button and click on "Insert Scene Selection Menu..."
  12. You will be asked how many scenes per page; choose 6 or 8 as per the number of scenes (to cut down on the number of pages choose 8). Scenes will be based on the markers within the large media file.
  13. Align items on the first Scene Selection page accordingly; then select all except the page re-direction arrows and then "Copy". You can then select all these same items on the remaining pages and Paste Attributes - All, to copy the formatting on this and other pages using this method.
  14. All the scene selection and menu page links should already be situated at the bottom of the respective page lists so that they will be highlighted last.
  15. prep and burn DVD.

Film Restore - Unshrink or Deshrink

Overview We have a few films that require unshrinking.  Reintroducing plastic into the films base is the idea.

Steps

1)   Mix up solution.

2)   Place solution in bottom of 35mm film can (metal).

3)   Place wire rack in can to provide "shelf" to hold film above solution

4)   Place film on rack.

5)   Close can and leave for 2 to 4 weeks?

Process

The higher the temperature the faster the process.  For example at 10 C it will be months and at 30 C it will be weeks.

Solution

1:1:3 of....Acetone, Gylcerol, and water.  The mixture will evaporate easily so it must be kept in a closed container.

You can also change the mix and it may work a little better.....see the reference below.

Adding camphor for nitrate based film or methyl phthalate (both plasticizers for nitrate and acetate bases respectively) may help in the process.

Testing and Results

(info to be added when testing)

Objective is to test the basic solution without the extra plasticizer.

How much solution do I need?  .....................

June 18, 2015 - placed 50ml of acetone and glycerine and 150ml of filtered water in 35mm can with 2 8mm films (Piedrahita)

References

Restoration Of Motion Picture Film pg 252

Methyl phthalate best deal to purchase

Royal Society of Chemistry website...good info

Synonyms:  Monomethyl phthalate; phthalic acid monomethyl ester; 2-(methoxycarbonyl)benzoic acid; 1,2-benzenedicarboxylic acid, 1-methyl ester

Good website about: Methyl Phthalate etc


Standard CD Case Cover

Overview How to create a standard CD case cover.

Tools

ACDSee

For editing the content of the case cover

Tag&Rename

For creating the tags and titles etc. for the case cover.

Nero CoverDesigner (v9)

For creating the case cover.

Nero

For moving title data, etc into the case cover.

Steps

  1. Create the wav files for the CD.  Probably using Sony Vegas.  Name the regions, and file names as "nn aaaaa" ...where nn is the track number and aaaa is the title of the track.
  2. Run Tag& Rename to set the tags (on Apollo).
    1. Go to directory with wav files and right click and select "tag&rename"
    2. Copy  the track number and title from the file names.
    3. Add anything else you need to the tags.
  3. Create cover art for the case using ACDSee.
  4. Open Nero Burning ROM and set up the CD
    1.  Drag wav files in
    2. Organize the wav files
    3. Save the nra file
  5. Create the cover
    1. In Nero, under File, select <print disc cover>
    2. This will open Nero Cover Designer and copy the titles etc to the cover.
    3. Edit the cover design and save or print.
    4. NOTE: The back cover insert will be too wide if using photo-paper.  I found that it fits if you move the right edge title from within the template to the left so that the bottom of the title is on the left template guide of the edge title.
  6. I usually use PrintCD to print disc surfaces.

List Of Directories And Count Of Contents

Overview: Sometimes we need to make a list of directories and their sizes or number of files within the directories.

Solution:

Karen's Power Tools has a program called Directory Printer that does many handy things with directories including providing a list of directories with number of files within each directory.  There are many other things the program can also provide.

We have been using the program to create directory lists of all our backup hard drives for years now.

Creating Tags And MetaData For Audio Files

Overview We have a set of audio files for creating a CD (or whatever) and we need to create metadata or tags within the audio files so that this information displays in various players, etc.  This information may also apply to video files.

Tools

Trackalizer script

This script is a free VASST script that assigns the region name as the wav file Title.

MediaInfo

This program can show the metadata of a file.  Standalone program that is also part of the explorer shell.

Sony Vegas

The properties / Summary contains metadata such as artist, copyright and title....however, title is useless here if you have multiple titles, one for each wav region....then use Trackalizer above.

Tag&Rename

The program is a general tag and create metadata program primarily for audio files (wav, mp3, etc).  Also, creates tags from file name components. Even sort of works for mp4.  Currently only have trial version.

AudioShell Tag Editor

Created by the same company as Tag& Rename but free.  This is an tag editor that appears in the explorer window when right click.  This can edit a group of files or files individually.

BWF MetaEdit

Open source metadata editor.   Not as nice a GUI, but very powerful and designed for archivists.  Can also create MD5 checksums and confirm them.  ONLY works on WAV files.

BWF MetaEdit was developed by the Federal Agencies Digitization Guidelines Initiative (FADGI) supported by AudioVisual Preservation Solutions.

This tool permits embedding, editing, and exporting of metadata in Broadcast WAVE Format (BWF) files. This tool can also enforce metadata guidelines developed by the Federal Agencies Audio-Visual Working Group, as well as format specifications from the European Broadcasting Union (EBU), Microsoft, and IBM.


Steps

  1. In Sony Vegas, go to the properties / Summary tab and fill in the metadata:  Artist, Copyright
  2. For each song on the timeline, create a region and name the region the song title.
  3. Render the regions into wav files and set each wav file's title metadata to the region name.
  4. Update the Album, genre, year, etc using the Tag&Rename program.

Using Anti-Newton Glass when scanning negatives

Using The ANR Insert for 35 mm Film  

The ANR Insert’s edges have been “lightly swiped” by the glass cutter but have not been fully rounded.  Use protective gloves with the ANR Insert unless you are sure the “light swiping” is enough to prevent cuts to your skin.


Understanding the Correct Orientation and Insertion of the Glass


Hold the ANR Insert at an angle to your room’s light source to determine which side of the insert has the etched surface.  The two images below should help you determine the etched vs. the un-etched sides of the glass.


 img1 This first image shows the un-etched side of the glass.  Notice the glare and the sharp/well defined reflection of the tree and clouds.  You DO NOT want your film to touch this side of the glass.
 img2 This second image shows the etched side of the insert.  It is actually reflecting part of the same scene as shown above.  However, please notice there are no defined shapes in this reflection.  In practical terms, you cannot distinguish the reflection of the tree.  You want this side of the glass to come into contact against the film when the ANR Insert is placed down into the holder!
Before placing the 35 mm ANR Insert into the holder, the Epson holder's detachable plastic snap-in frame must be removed from the holder.
Note that the film can't be inserted all the way to the end of the film channel due to the fact that one end has clips (highlighted by red arrows in the picture to the left).
When the film and ANR Insert are correctly inserted, observe how the film does not extend out past the end of the ANR Insert.


Using the 35 mm Insert


The ANR Insert is fairly simple to use with 35 mm film.  Film is placed normally in the holder and the ANR Insert is placed on top the film instead of using the Epson or Canon holder's snap-in frame.


 img3 Film must be placed into the film holder so the film arches up and away from the scanner's glass bed.


You DO NOT want to insert the film into the holder so that the center of the film bows/sags down toward the scanner's glass bed.  Improper insertion could lead to poor focus and/or Newton Rings if the bowing is significant enough.  Correct orientation will allow the ANR Insert to flatten the film.


Epson® recommends inserting the film so the emulsion side (dull side) is facing up and away from the scanner’s glass, thus the manufacturer’s edge markings on the film appear to read backwards (as viewed when the insert is placed into the holder).  If your film is relatively flat, orient the film this way first, but don’t be afraid to experiment with the orientation of the emulsion.  If you scan your film “emulsion side down,” you will need to reverse or flip your image to make it laterally correct.  This is easily accomplished in Photoshop by using the following menu commands: Image > Rotate Canvas > Flip Horizontal.


Very Stiff Film


Some films are so stiff that the 35 mm ANR Insert cannot flatten them down via its own weight.  In this case, after you insert the 35 mm ANR Insert into the holder you can tape across the ends of the insert to press it down.  Alternatively, you can build up the thickness of the OEM Epson® 35 mm film holder’s posts by wrapping tape around the little protrusions/towers located along the edge of the film channel.  The increased thickness will thus act to “wedge” the ANR Insert in tight when it is placed down into the film holder.


Cleaning


A 3M® microfiber cloth is recommended for general light cleaning of the ANR Insert.  (These cloths are also great for cleaning your scanner’s glass!)  Wal-Mart sells these for just a few dollars or they can usually be found in any store that sells optical products.


Windex and a soft clean cloth that is lint-free can be used to clean the ANR Insert.  An alcohol-based glass cleaner may work somewhat better on the etched side of the insert if you have a stubborn smudge that has embedded itself very deep into the etching.  If that still doesn’t remove the smudge, try a mild degreaser like "Fantastik" or "Formula 409" followed by a second cleaning with the glass cleaner and a second clean cloth.


ORDER NOW - Pricing and Ordering Page for ALL Products


Back to the Page You Were Previously Viewing


Safety, Return Policy, Warranty and Disclaimer Information


Batch Scanning Notes for the MF Film Holderä Page


Home Page for All Products


E-mail Contact:  scanning@betterscanning.com


All information contained in this website ©2003-2010 by DSF OmniCorp, LLC and Doug Fisher and it may not be reproduced in whole, part or spirit without written permission


MF Film Holderä  Patents Pending


Brumberger Stereomounts for 3D Slides

These were 35mm stereo slide mount made of metal and glass.  Very high end.  We looked at taking them appear to scan and clean.  The top and bottom of the mount each have two holes where the inside of the mount pushes a bump through.  We looked at prying the inside and outside of the mount but found there is VERY little space to pry.  Also, there a warnings about glass mounts that the film may be stuck top the glass and this may cause a problem....either the image gets damaged or you may need to soak the glass and image in distilled water (must have NO minerals otherwise more issues). Here's an image of the mount:

http://www.digitalstereoscopy.com/kaiser/m214n215.htm

Here's instructions and image of putting these mounts together:

http://www.digitalstereoscopy.com/kaiser/m248n249.htm


Posting a Deposit For A Project

Overview When a customer provides a deposit, the deposit should actually become a liability and therefore reside under liabilities until the project has been invoiced.

This method will also record the deposit on the invoice for the customer's records and it will provide a receipt for the deposit.

Steps

  1. Create the customer.
  2. Create a Sales Receipt for the customer's deposit.
    1. Use "Advance Deposit" item and update the amount to the deposit amount.
    2. This should post the deposit to the "Undeposited Funds" account and should also post the deposit to the "Advanced Customer Payments" liability account.  The deposit should not show under P&S's sales, but will show under the Liabilities on the Balance Sheet.
  3. Deposit the "Undeposited Fund" as normal to the chequing account.
  4. Create the invoice when the project is done (or when we need to bill).  Add a line item, "advance deposit", to the invoice and use QTY of -1 and the amount should be the deposit amount.  This will clear the deposit from the liability account.
  5. The invoice will now show the invoiced items and the deposit and the balance  will show the outstanding amount.

Retro Film Output Formats

Currently here is the list of output options from the Retro units:

  • Sequenced jpg's
    • 1920x1080, 0.5MB
  • MP4
    • Sony AVC/MVC 1920x180-30p 16Mbps
    • Use this setting to create the highest quality 16:9 file suitable for uploading to Internet sites. Audio: 128 Kbps, 48,000 Hz, 32 Bit, Stereo, AAC Video: 29.970 fps, 1920x1080 Progressive, YUV, 16 Mbps Pixel Aspect Ratio: 1.000
  • AVI
    • NTSC DV Widescreen progressive 30Mbps
    • Widescreen NTSC DV video files compatible with Sony Video Capture. Audio: 48,000 Hz, 16 Bit, Stereo, PCM Video: 29.970 fps, 720x480 Progressive, NTSC DV Wide Pixel Aspect Ratio: 1.212
  • MXF
    • HD422 1920x1080-24p 50 Mbps
    • Audio: 48,000 Hz, 24 Bit, Stereo, PCM Video: 23.976 fps, 1920x1080 Progressive, MPEG HD422 Pixel Aspect Ratio: 1.000


Micro Cassette Transfer To Digital

Overview A micro cassette is a small audio cassette that was commonly used in answering machines, dictation machines, and small format audio recorders.

Equipment

We have a Sony Micro Cassette-corder M-601.  The unit is capable of playing in 2 speeds, 1.2 or 2.4 cm/sec (or 15/16 or 15/32 ips).  The recording is 2 track, 1 channel, monoaural.

DO NOT TOUCH THE PAUSE BUTTON - the pause button gets stuck and will not come back up without taking the unit apart.

Set Up

The M-601 is packed in it's original box on the shelf.

  1. Unpack the unit.
  2. Check the m-601 batteries, push PLAY to activate the battery indicator.
  3. Plug the stereo (or mono/either or) phone cable (M-M) into the earphone jack on the side of the unit.
  4. Plug the other end of the mono/stereo-phono cable into the Echo patch box with a MONO jack only - ISSUES ARISE when this is inadvertently swapped with a STEREO JACK.  Use analogue input 7 ON THE ECHO (LAYLA).... the same input that was used for the Super8 audio input whence we digitized Super8 audio separately. This set-up can then be tested by simply pulling the stereo/mono plug from the Micro deck.
  5. On MUSIC open the Micro-Mono-Anolog7 audio veg file and setup the folder to record into.
  6. Test the tape, ie. this can be done by simply pulling the stereo plug from the machine.
  7. Rewind tape and record.